How to Edit Your Product Photos for a More Polished Look: A Guide for Newbies 📷
Are you a small business owner looking to elevate your product photography game? Or maybe you’re a freelance photographer on a tight budget and can’t always afford to hire an editor. Fear not fellow shutterbugs! In this blog, we’ll go over some simple ways to edit your product photos for a more polished look, without breaking the bank or requiring a degree in graphic design. Let’s dive in! 🌊
Start with a Clean Background 🔍
Before we even get into the weeds of editing, it’s important to set up your photos for success from the get-go. To achieve a more polished look, start with a clean background free from any distracting clutter or debris. If you don’t have access to a professional studio or a white infinity background, consider purchasing a roll of seamless paper or using a large piece of white poster board as your background. Make sure there’s ample natural light or a lighting kit set up to illuminate your product.

Crop and Straighten Your Photos 📐
Next up, give your photos some structure by cropping and straightening them. This can help eliminate any unnecessary visual noise, bring focus to the main subject, and create a more cohesive look for your product lineup. Use the rule of thirds or golden ratio to help guide where you should be cropping your images. This can help create a sense of balance and harmony in your compositions. Pro tip: use a level tool to ensure your photos are straight and not tilted.

Adjust Brightness and Contrast 🌞
Now that your photos are looking clean and tidy, let’s work on the lighting and exposure. Adjusting the brightness and contrast can help bring out more detail in your photos, making them appear more dynamic and interesting. However, be careful not to overexpose or oversaturate your images. Aim for a natural and consistent look across all of your photos. Consider using a histogram tool to help guide your adjustments and ensure a well-balanced exposure.
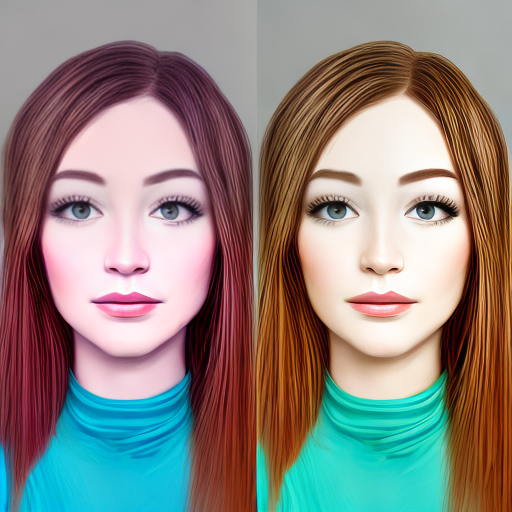
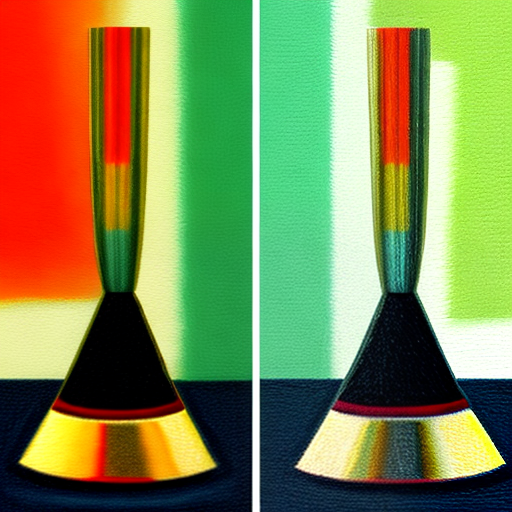
Color Correct Your Photos 🎨
The color of your product can affect how potential customers perceive it, so it’s important to accurately represent it in your photos. Use a color correction tool to adjust the hue, saturation, and temperature of your images to achieve a more true-to-life color. This can also help create a more cohesive look across your product line by making sure all of the colors are balanced and consistent.
Sharpen Your Images 🔪
The final step in editing your product photos for a more polished look is to sharpen them. This can help bring out more detail and create a crisper, more defined image. However, be careful not to oversharpen, which can create unwanted artifacts or a “halo” effect around edges. Use a low sharpening amount and radius to achieve a more subtle effect, and remember to view your photos at 100% to ensure there’s no unwanted noise or distortion.
And there you have it! By following these simple steps, you can elevate your product photography game and create a more polished look for your business. Remember to experiment and play around with different editing techniques until you find a style that works for you. Happy snapping! 📸
